13. Note that the squashed square is always in the center of the model.Fold up as before.
14. Complete the level by sinking the other 3 corners.
Online collections
monedastodas.com
All collections » Origami » Andrea's Rose
J.C. Nolan 9/25/91
Intermediate difficulty level. A 10" piece of paper produces a 5" model.
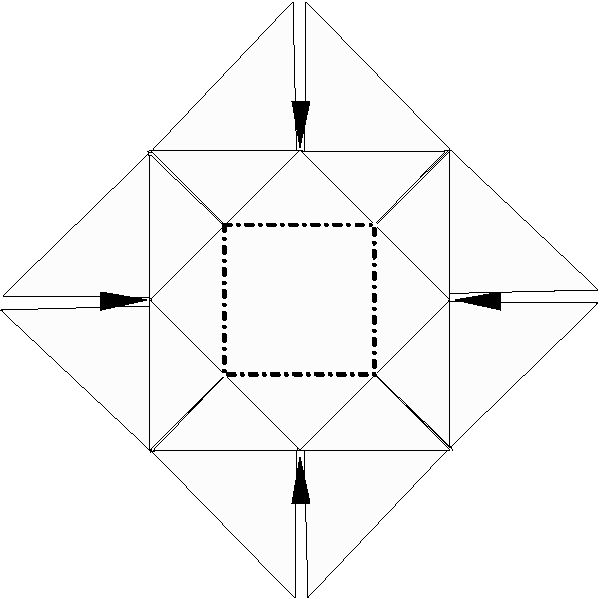
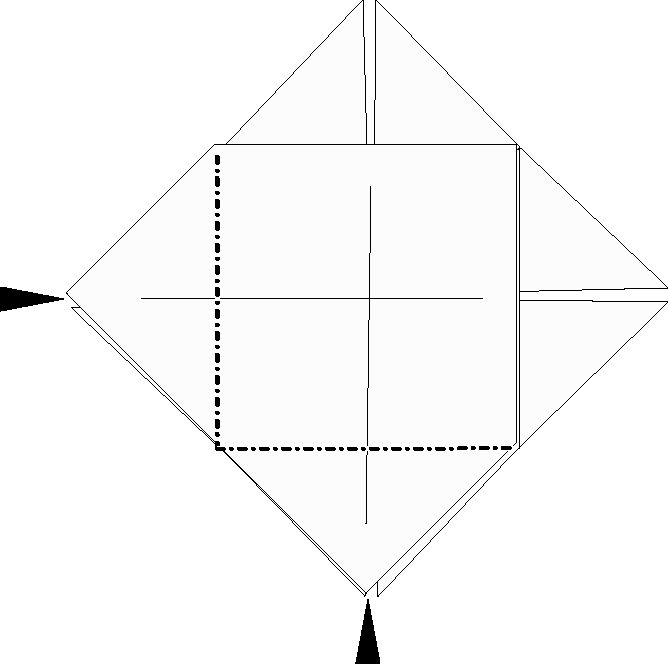
6. This is a completed windmill base. Sink all four corners.
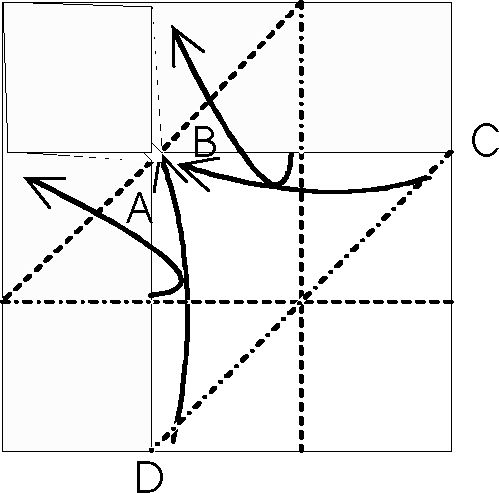
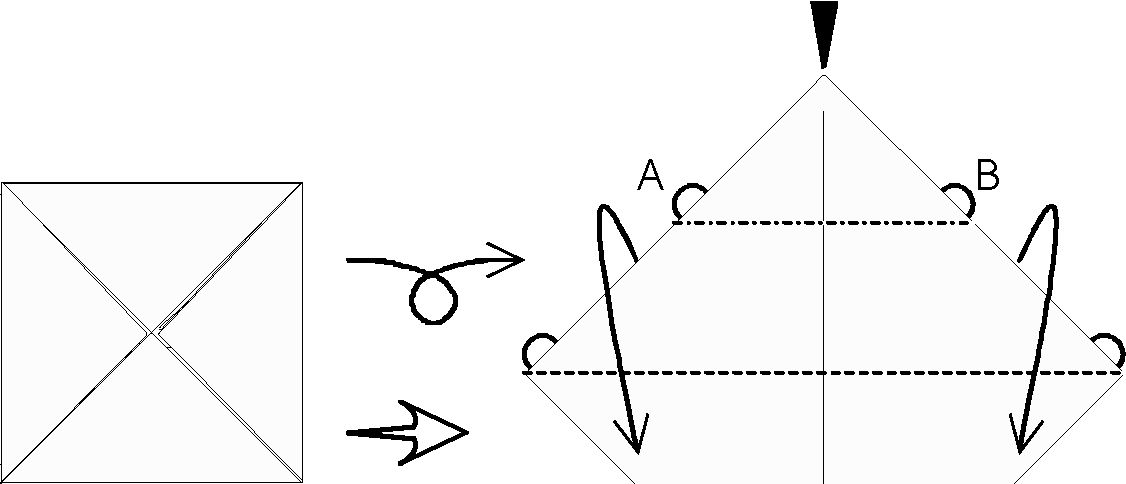
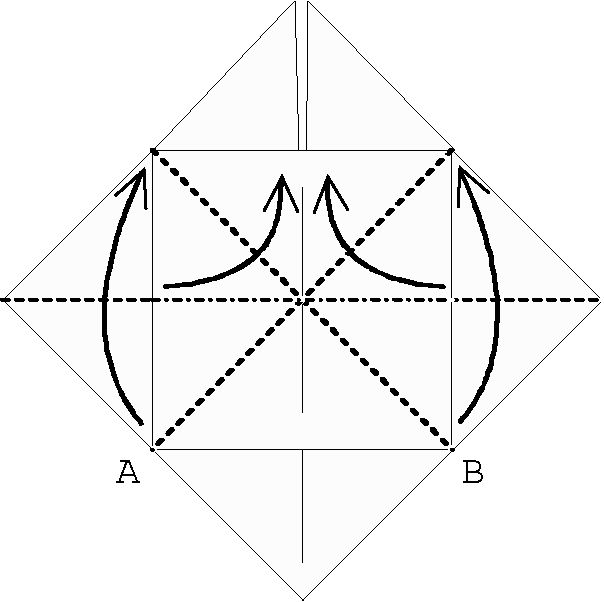
4. Following the existing creases start to fold a windmill base, bringing points A and B to the center.,
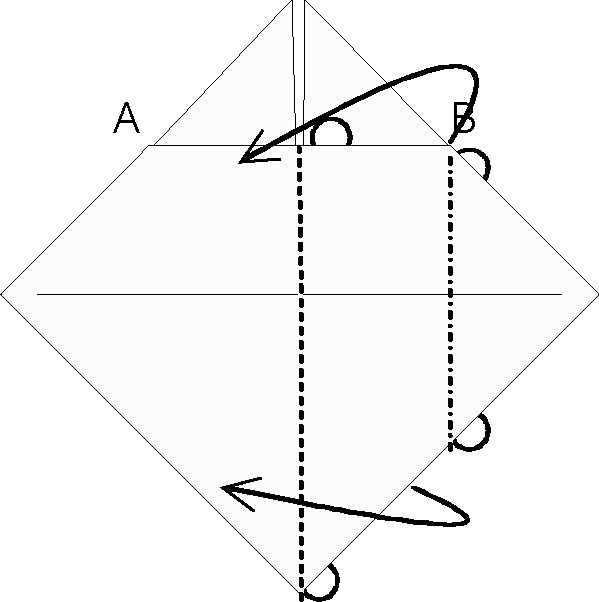
5. To complete the base, do the same with C & D.
7. Turn the model over.
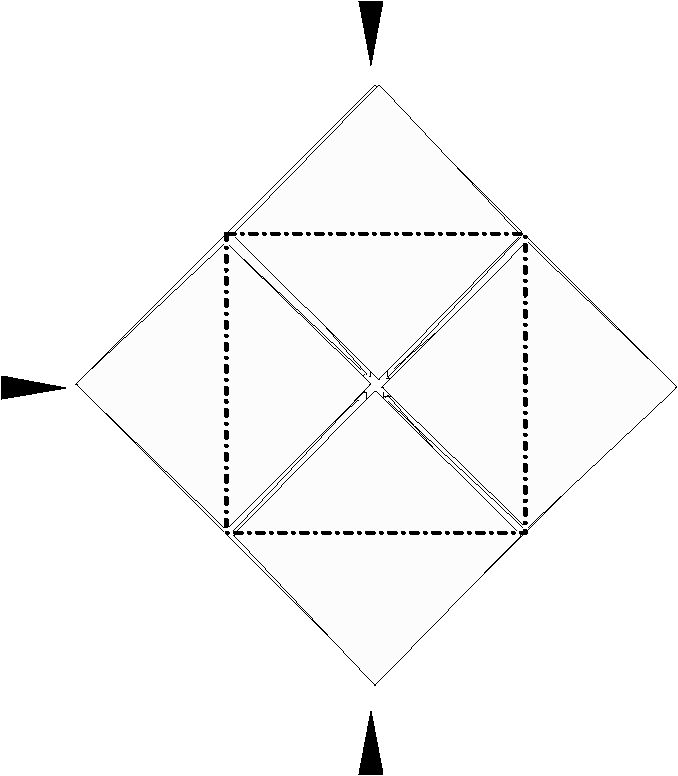
8. Now you will execute the next level of sinks using the spreadsquash method. Note the location of the four anchor points. Place your two index fingers on the upper points, under two layers of paper, and your thumbs on the lower points, under just one layer of paper, and pull the upper layer of paper downward, across the center of the model, pushing on the upper point with your third thumb, causing it to spread-squash into a square located directly over the center of the model.
9. Fold the spread-squash back up on the existing creases, pulling one layer from each side inward and upward.
10. Now, repeat steps 8-9 on the next corner. Note the placement of fingers. Be careful when folding the sink back up, it is as easy to grab
11. Repeat the sink on the last two corners.
two layers as one.
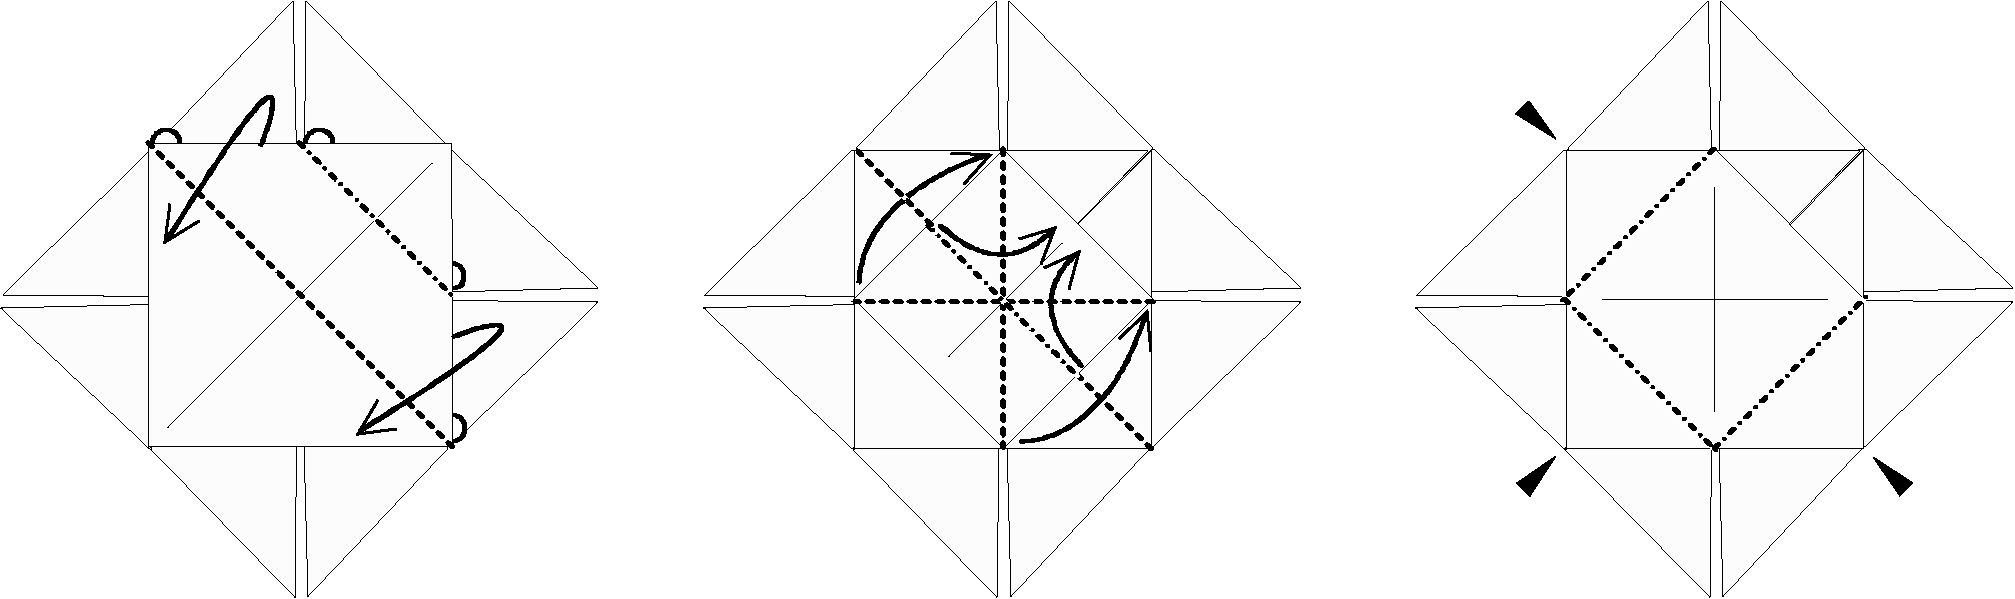
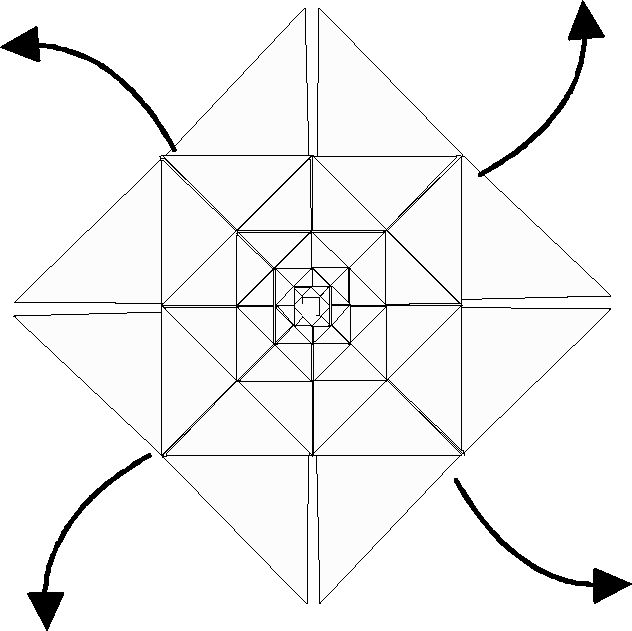
12. The second level of sinks is complete. The model should be symmetric in four directions, if it is not, then a mistake was made in folding up the sinks. Continue sinking on the next level.
13. Note that the squashed square is always in the center of the model.Fold up as before.
14. Complete the level by sinking the other 3 corners.
16. To complete the model, valley fold the last set of flaps towards the center, and pull the flaps out from behind.
17. Completed model.
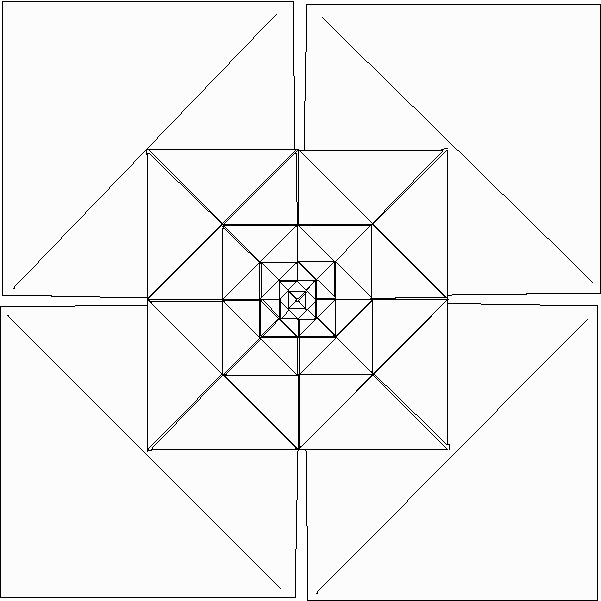
15. Keep adding levels until your paper shreads irrecoverably, your eyes explode, or you feel satiated by the process. As a challenge, I recommend eight levels on an 10" piece of paper.
Download PDF file with this instructions for printing